What do you need to know?
Create Video Pages on Website
Basic Checklist:
- Copy the correct YouTube URL
- Go to Video Draft Tool
- Paste the URL and click “Fetch Video”
- Check the title
- Create excerpt
- Select feature image
- Give Category
- Give Tags
- Confirm and create
- Set Publish date
- Preview
- Publish
- Send to another volunteer for them to check your work
Find the video on YouTube
Find the proper url
Learn to recognize the difference between a link to a single video and a link to a video that is part of a playlist. We always need the single video link.nNotice the bold part of the second link
Single:https://www.youtube.com/watch?v=vK_HKy8nvLQ
Part of Playlist:https://www.youtube.com/watch?v=vK_HKy8nvLQ&list=PLIqIzb1e84AVLZN0L7Wtt2mZgkTdjQjSK&index=26
You can be sure to get the link with the playlist if you start out going to the playlist first. Then all the videos from that page should be correct.
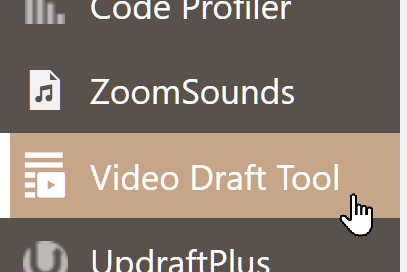
Open the Video Draft Tool
You can find this on the left hand menu bar towards the bottom:
You will then see this screen:
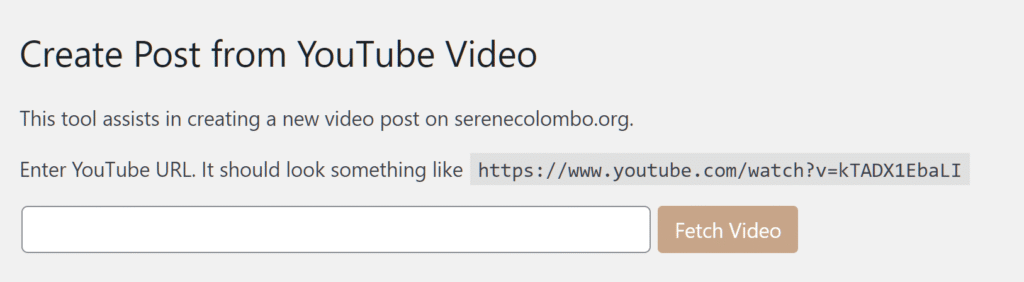
Paste your link in the field and click “Fetch Video”.
Review title

Generally, use the same title as found on the YouTube video. Unless it is really long. In that case shorten.
HOWEVER: Many of the titles include a line to separate parts of the title. This line should be the pipe character | (found as shift \, above enter key). But many times they have used the number 1 or the lowercase l.
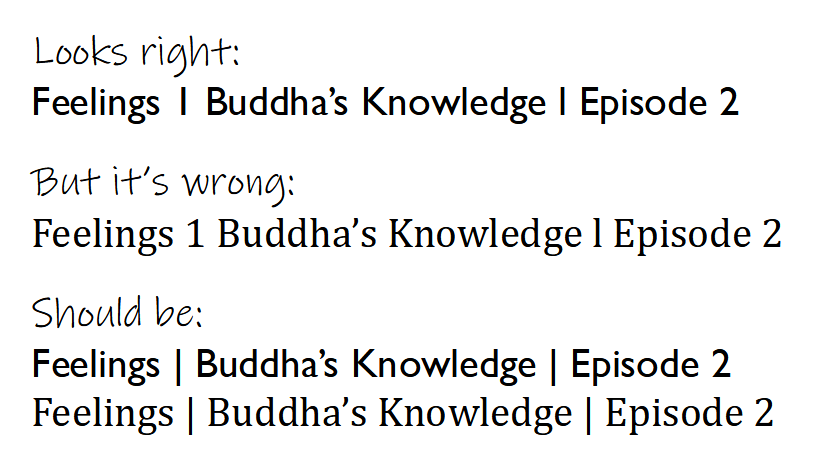
When you look closely, you can see how the pipe character drops below the baseline like the letter p.

Create post excerpt
This should be a single sentence or two between 50 and 250 characters. It could be taken from the description. The purpose of the excerpt is to attract people to watch the video. This is what will appear on pages that collect all the videos from a category. End the excerpt with how long the video is, for example: (10 min).
Review Thumbnail
The tool will automatically find all the thumbnails available from the video cover image. For example:
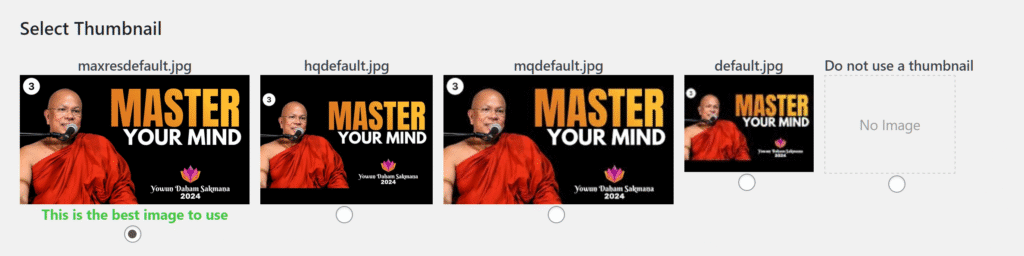
You probably will always want to use the maxresdefault.jpg version that is already selected. If none of the images look correct, or you want a completely different image, select “Do not use a thumbnail” and one can be added later.
⚠️ Note: Once you click “Confirm and Create Post” the thumbnail you select will be imported into the Media Library (this is where all the images on the site are stored). Even if you delete the draft or the published post later, that image is going to stay in the library. So to make sure we only have images that are being used, if you delete the draft, try to go to the media library and delete the thumbnail.
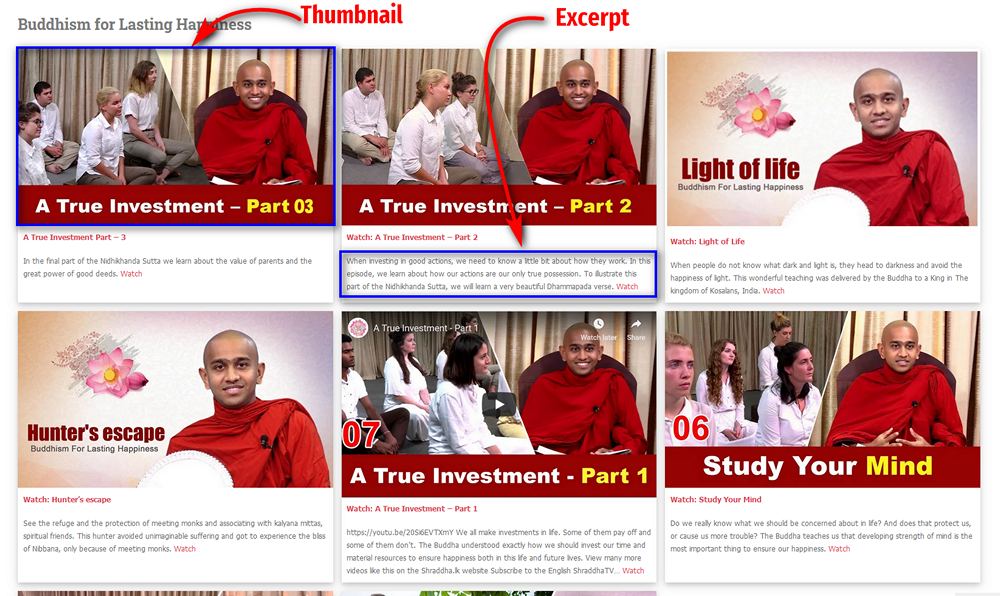
This is where the featured images and excerpts will appear on the site, for example on this page:
Review description
Do not include the generic paragraph that says things like “We’d love to hear from you! contact us at…”
It is good enough to just use the text that is on the YouTube page itself. However if you want to enhance it with more information from the video that might encourage people to watch, that’s great too.
Give tags
Try to give at least one tag. Read these articles about tagging. In the tool, you can only pick from existing tags. Later you can create new tags, but do so with cation.
⚠️ Please follow our Tagging Guidelines carefully.
Give category
If the proper category doesn’t exist, check with the Bhantes first. You can always pick the closest category and then change it later. Use Short Sermons & Dhamma Videos if nothing else fits.
Confirm and create
After reviewing, click the “Confirm and create post” button. This will automatically create a new post. Be patient! It may take a few seconds to fully create the post.
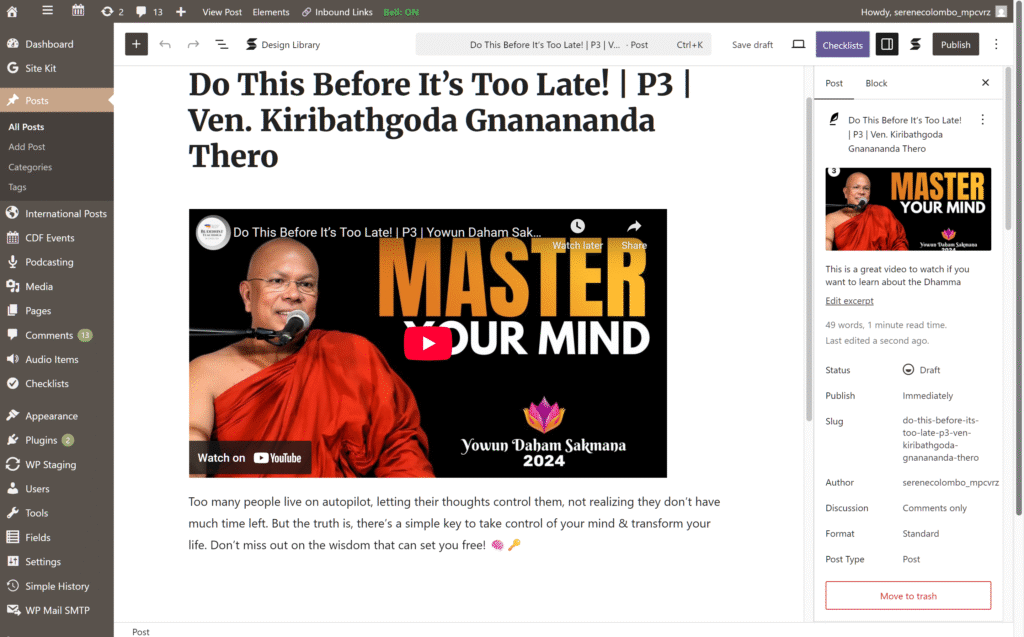
Review your new post
You will now see the real post editor page:
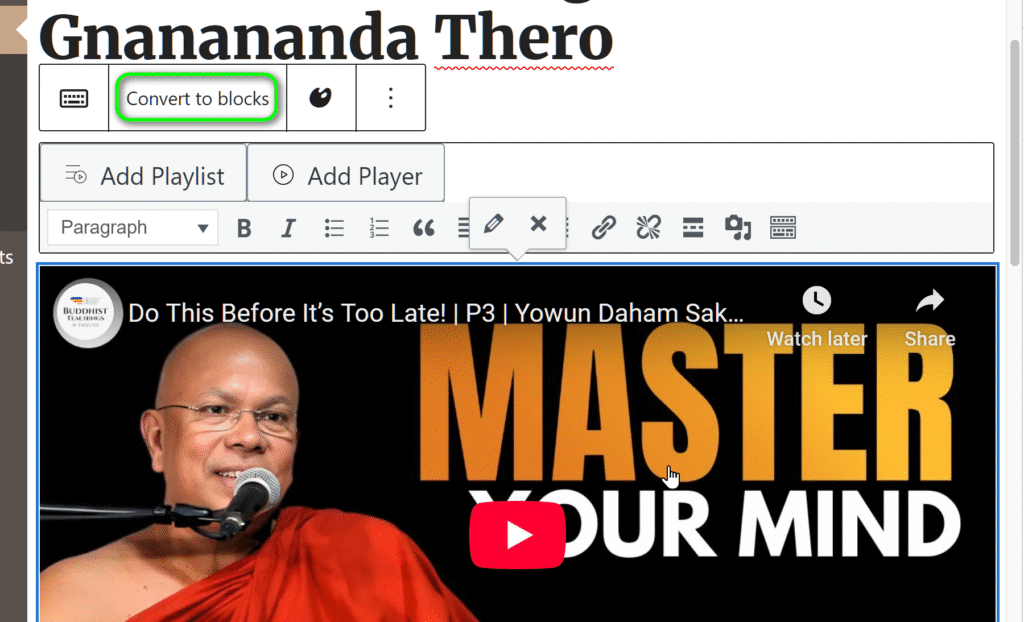
Sometimes the import process is incomplete and you have to do an extra step.
Click on the video image. If you see something like the below image, click on Convert to blocks. Again, this may take a few seconds to process.
Middle section (main post content)
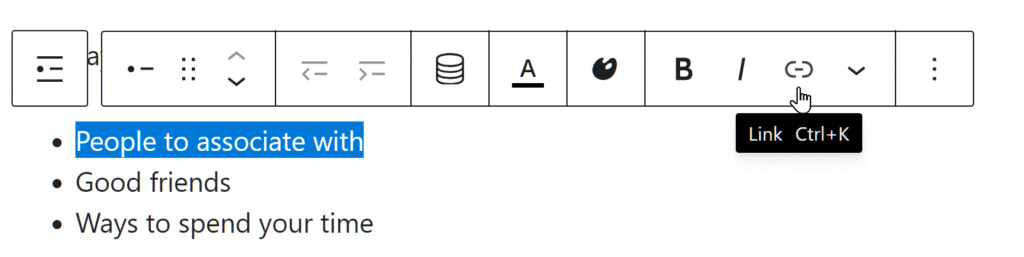
The middle of the page is where you can edit the post content. If you have time and want to find other content on the website to link to, you can add it under the text there. Just write a paragraph or a list and create links to the pages.
Select the text you want to be the link and click on the link icon:
Then there will be an interface to add the url.
Although it is not required, adding in relevant links to other pages on our site is one of the best ways to improve SEO and at the same time help people to find more content. However it is better to have a simple post than no post. Here is a great example of a post with a “see more” type section: https://www.serenecolombo.org/saving-a-life-will-change-yours-cdf-world-news-buddhas-great-message/
You can find other posts by using the site search:
Right column (metadata)
The right column is where you change the metadata about the post, such as featured image, excerpt, publish date, tags, and categories.
If there is no existing tag appropriate you can add a new one. Just be sure to follow the tagging guidelines.
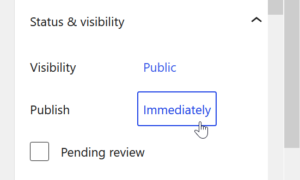
Set publish date
Click on Immediately under Status and Visibility. Then set the publish date to the date the post should appear on the website. Please check to see when the last post was published or when the last scheduled post is set to be published. (You can see that here.)Then set the publish date to be two days after that. If a post hasn’t been published recently,
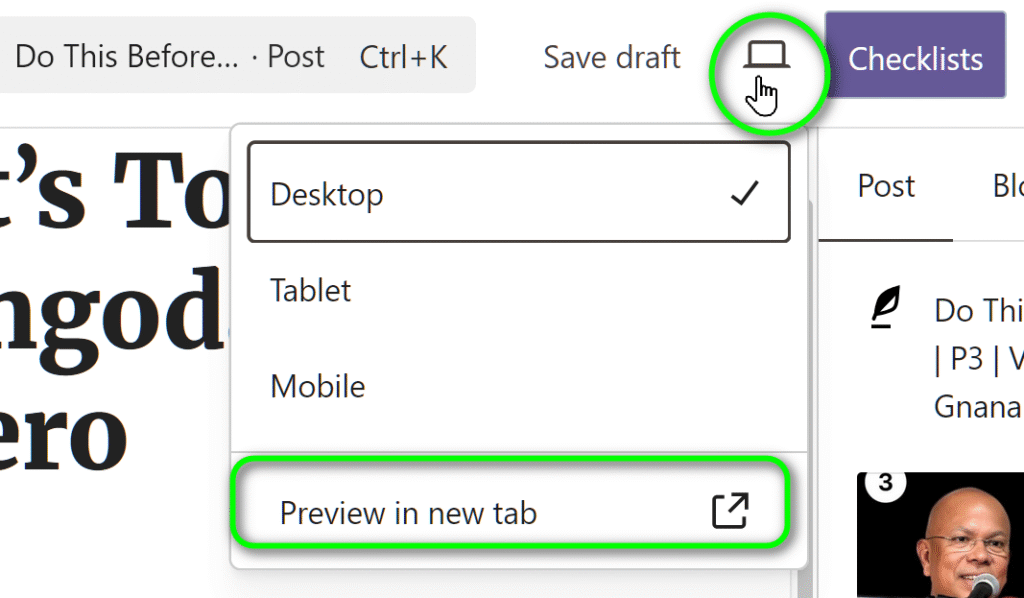
Preview and Publish.
Check your post by previewing in a new tab.
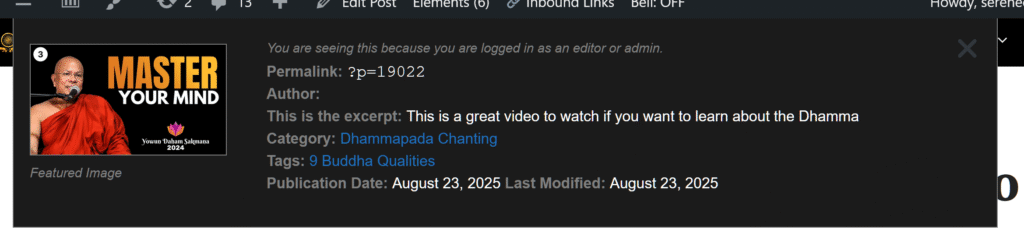
You won’t see the featured image or excerpt on the preview page. However you will see a + button in the bottom left of the page:
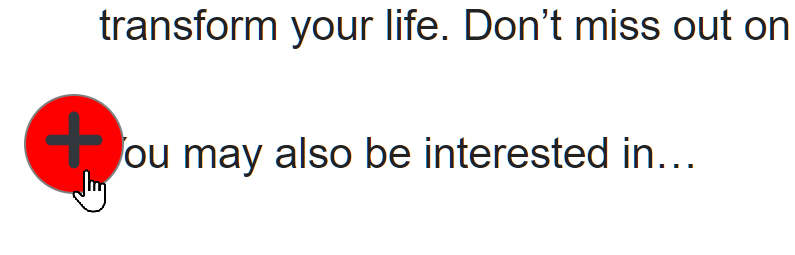
Clicking on that will review all of the metadata for the post:
You can click on the blue category and post links to see what the other posts with those tags and categories are if you want.
After publishing, you can find your post on one of the pages that shows all videos in a category, such as serenecolombo.org/buddhism-for-lasting-happiness/. If a page like that does not exist, please let the Bhantes know.