What do you need to know?
Build a new sandbox
There are 4 major steps to build a new sandbox site:
A. Empty old sandbox site
B. Create a new package
C. Put the package in the old sandbox
D. Install the package in the sandbox
E. Prepare the sandbox for use
A. Empty old sandbox site
This will be done by the Bhante.
B. Create a new package
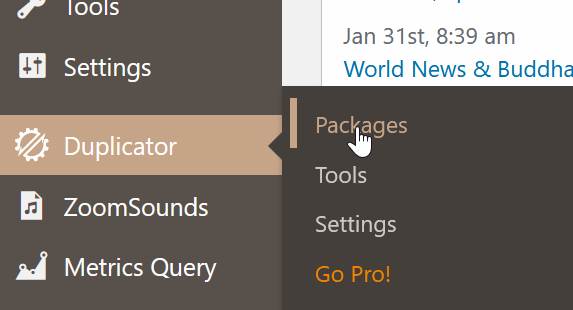
B1. Go to Duplicator>Packages
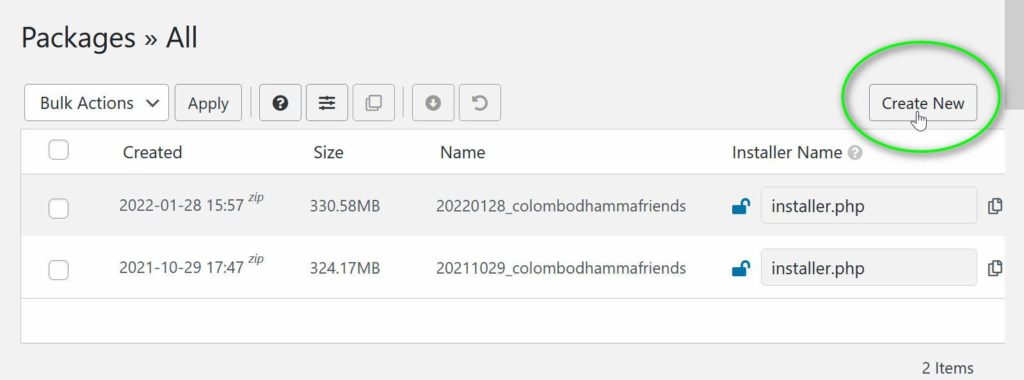
B2. Click Create New.
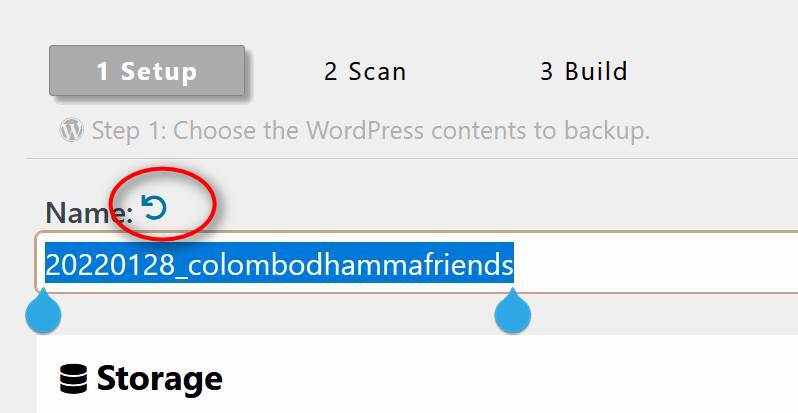
B3. Click the round arrow to reset the name. It should start with today’s date. You may have to click several times.

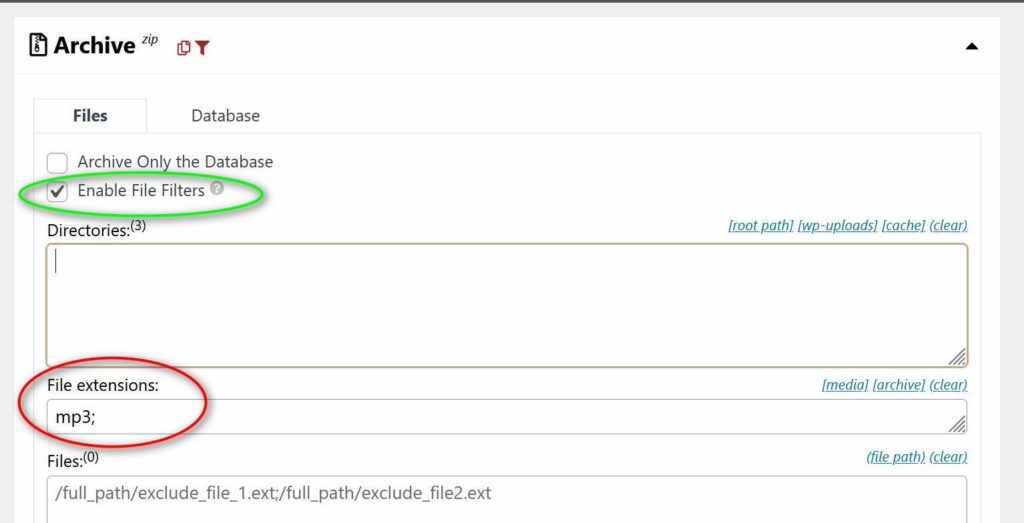
B4. In the Archive section make sure that only Enable File Filters is selected.
B5. Under File extensions make sure it says mp3;.

B6. Then at the bottom click Next.
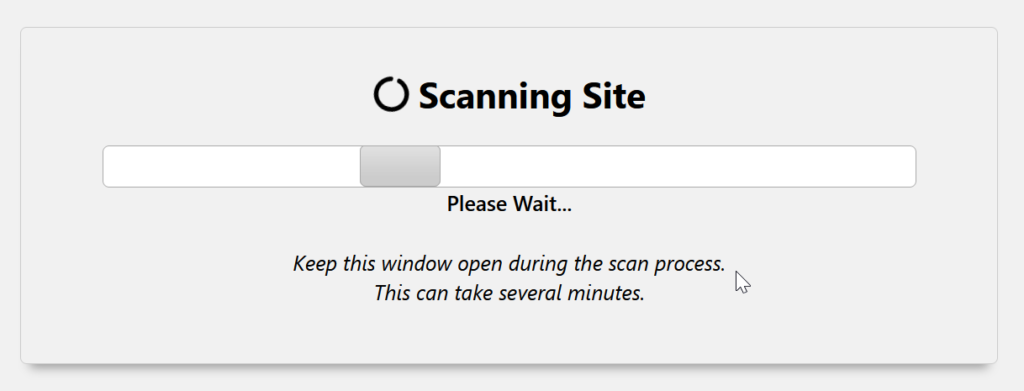
You will then see the following box appear:
Once the scan is over, you will see something that looks like this:
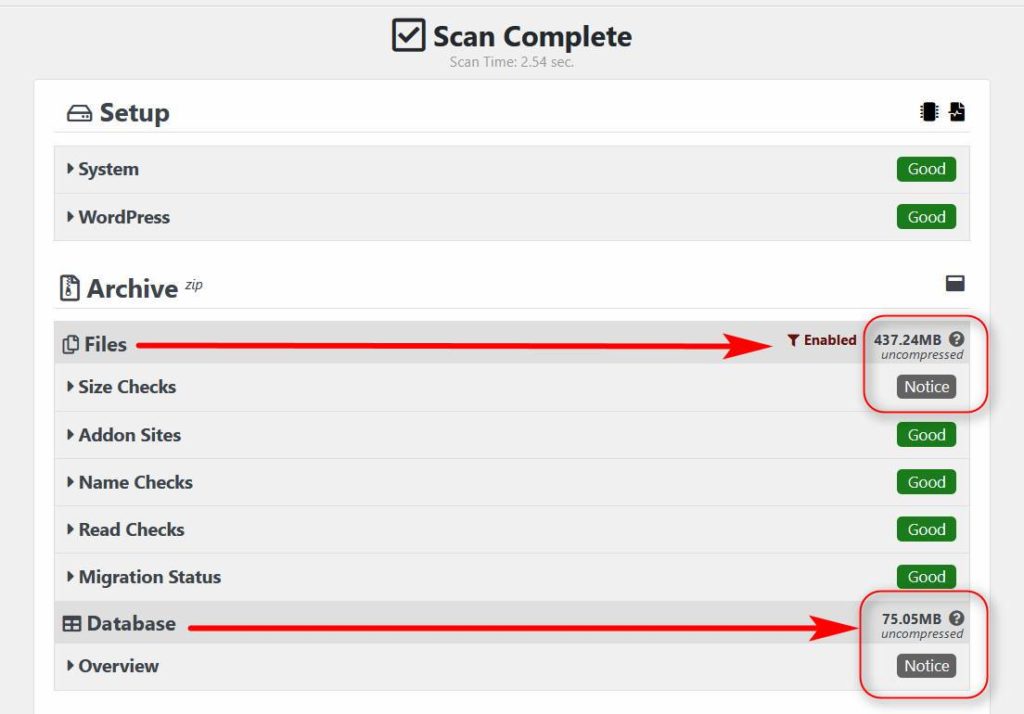
B7. The notification under Files should indicate less than 500mb.
The notification under Database should indicate less than 100mb. If it is larger than that, please notify the Bhante.

B8. You will then have to check Yes. Continue with the build process!. Then click Build.
You will then see the following message:

Wait until it completes without closing the window. It may take up to 5 minutes. If it takes longer than 10 minutes, please notify the Bhante.
If everything works, you will see a message like this:
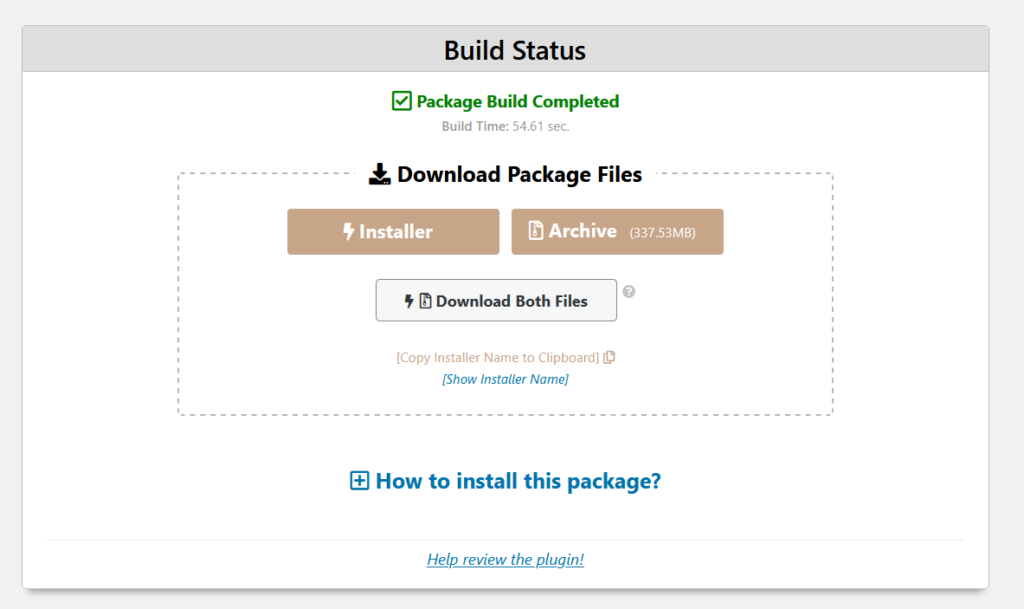
If there are any error messages along the way, please take screen shots and notify the Bhante.
C. Put the package in the old sandbox
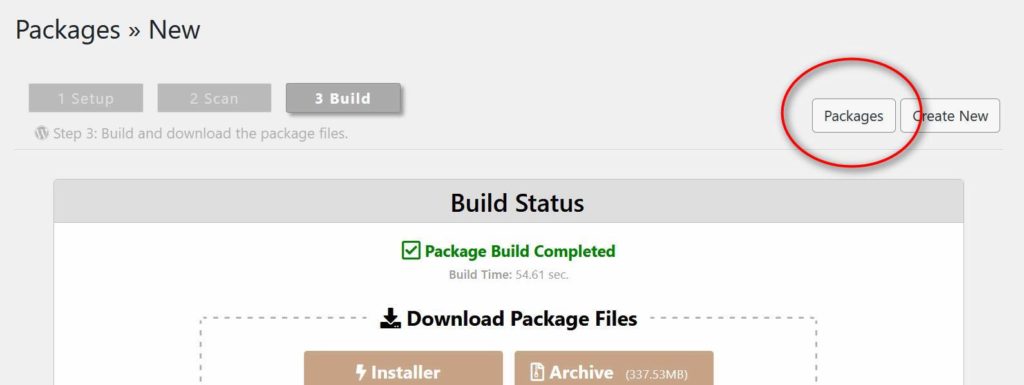
C1. Now we need to get a link for downloading the package. Click Packages again.

C2. Find the package you just created and click on the file box icon at the very end of the row.
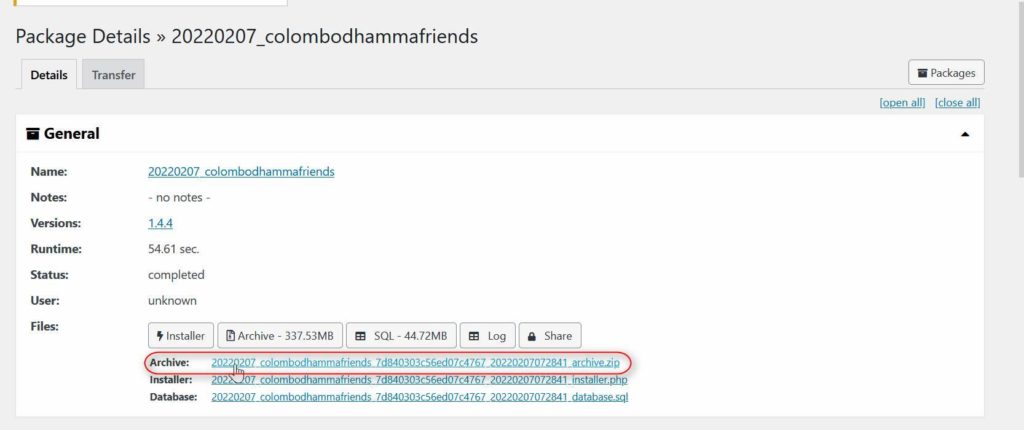
C3. You must right click on the link that says Archive, not the button with the same name. Then in the popup menu, select Copy Link or Copy Link Address depending on your browser.
C4. Then give this link to the volunteer who will be doing the download and upload.
C5. You will need to tell them exactly where to place the package . Please see instruction C5 in the Confidential Details for Sandbox Creation file given to you by the Bhante.
D. Install the package in the sandbox
D1. The uploading volunteer will have to tell you the exact name of the installer file. The name will look something like installer.php or possibly something much longer. In any case, it will end with the extension .php. If it does not then it’s not the installer file.
D2. In a new tab in your browser, you will need to build the url to start the installation process. It will be something like
https://sandboxname.serenecolombo.org/installer.phpWhere you will replace sandboxname with the actual name of the sandbox site (see confidential details document step C5) and installer.php will be replaced with the exact name of the installer file.
D3. Put that in your browser’s url bar and hit enter. Wait till you see the following page:
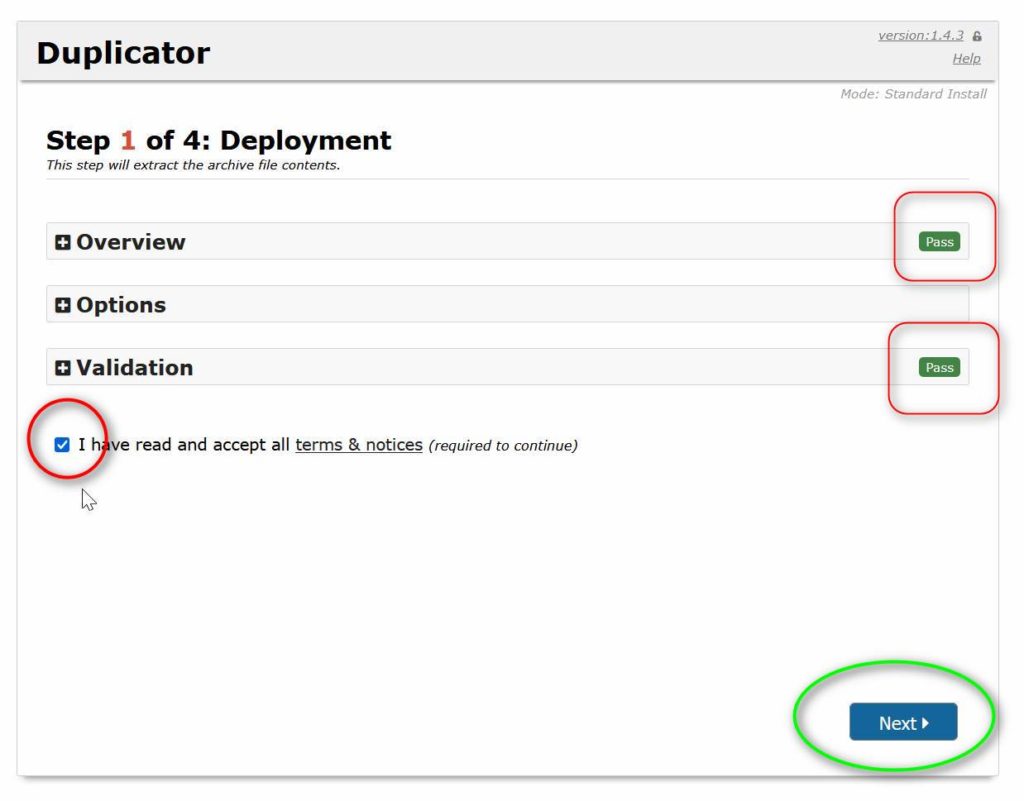
D4. Check the box and click Next. If it looks any different at all, take a screen shot and notify the Bhante.
You will then see the following message:

This could take several minutes. If it takes longer than 10 minutes, notify the Bhante.
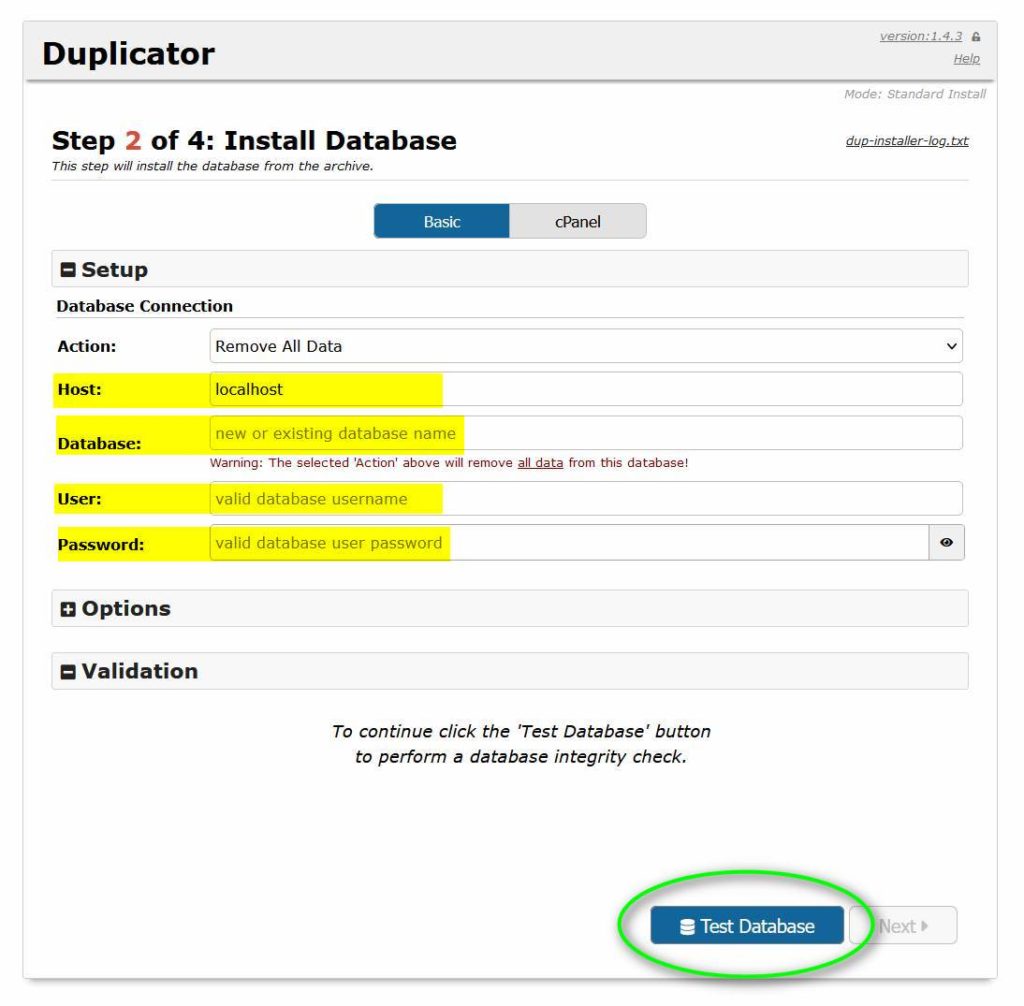
D5. This step is very important. do not click anything other than what is mentioned below.
Please see instruction D5 in the Confidential Details for Sandbox Creation file given to you by the Bhante. Enter that information in the form above for the exact sandbox you are creating.
Then click Test Database.
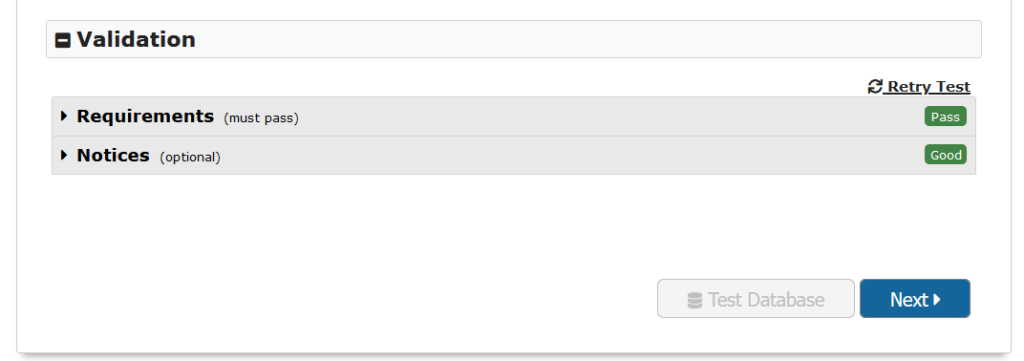
D6. If both validations pass, click Next. Otherwise notify the Bhante.

You will then see the message above.
D7. Double check the information and click OK. If you enter the incorrect information, it will overwrite the wrong sandbox site.
You will then see the following message:

Wait for the installation to complete. If your browser asks you if you want to save the password, say no.
If everything works, you should see the following screen.
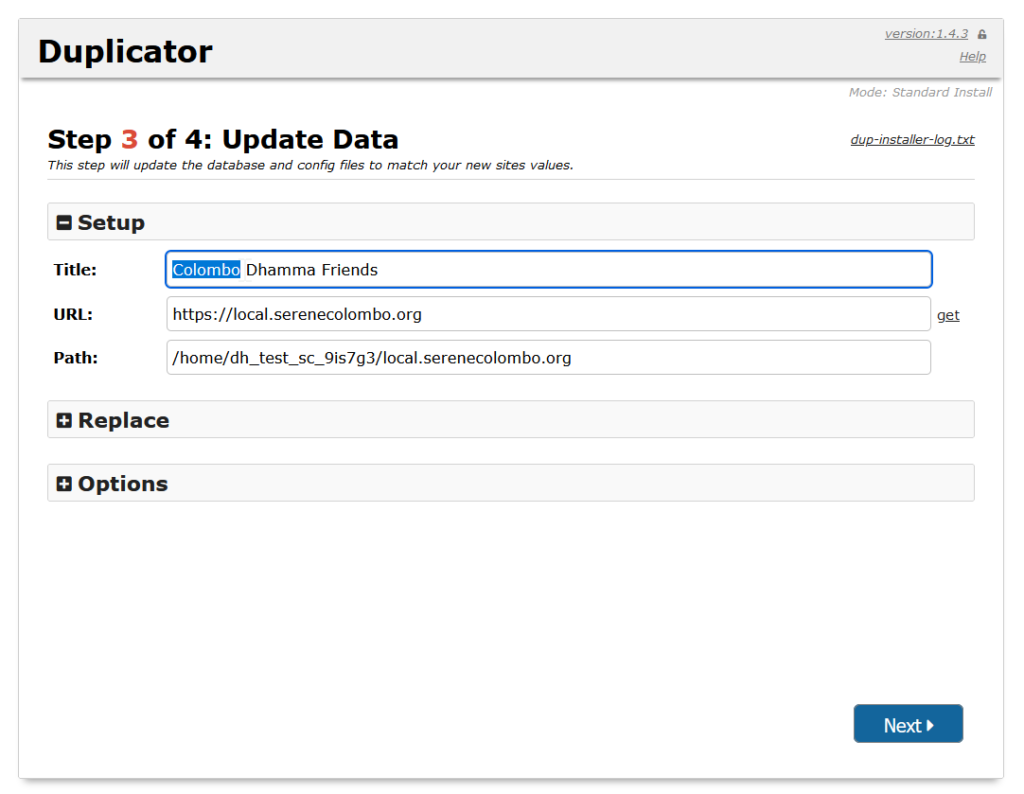
D8. Replace the word Colombo with the name of the sandbox site. For example, for local.serenecolombo.org, it should say Local Dhamma Friends. Click nothing else except the Next button.
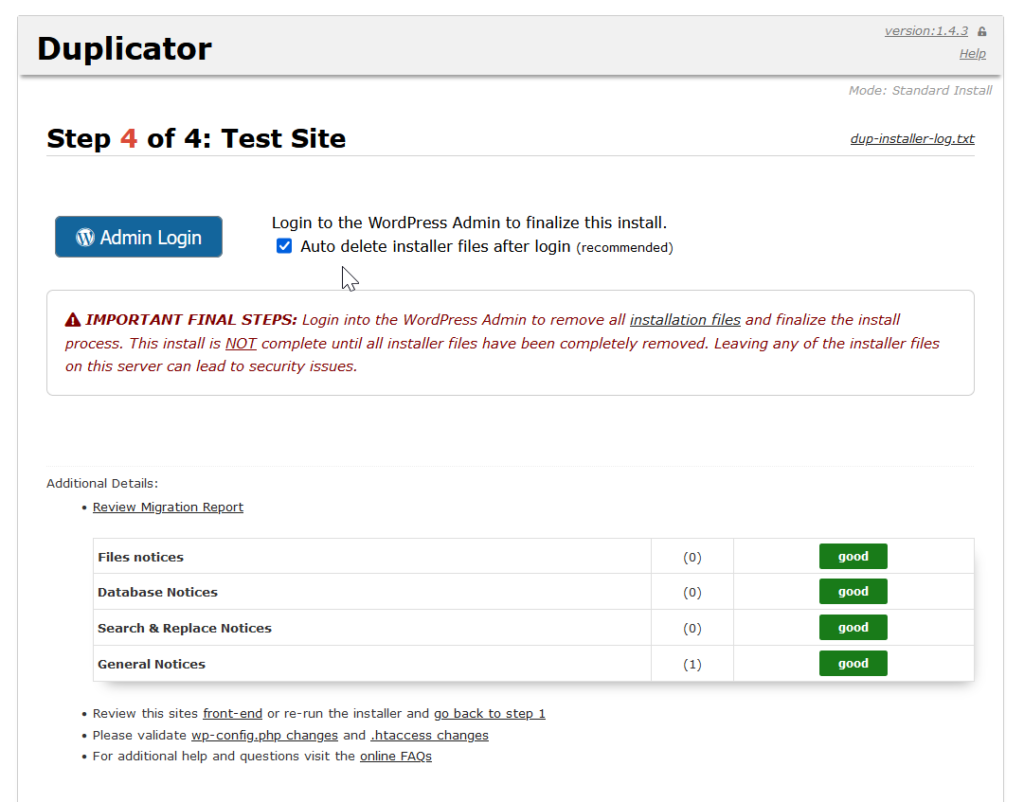
D9. Make sure Auto delete installer files... is selected and then click on Admin Login.
Once you are successfully logged in to the website, you can close the tab above.
D10. At the login screen, use the same user name and password from your account on the main site.
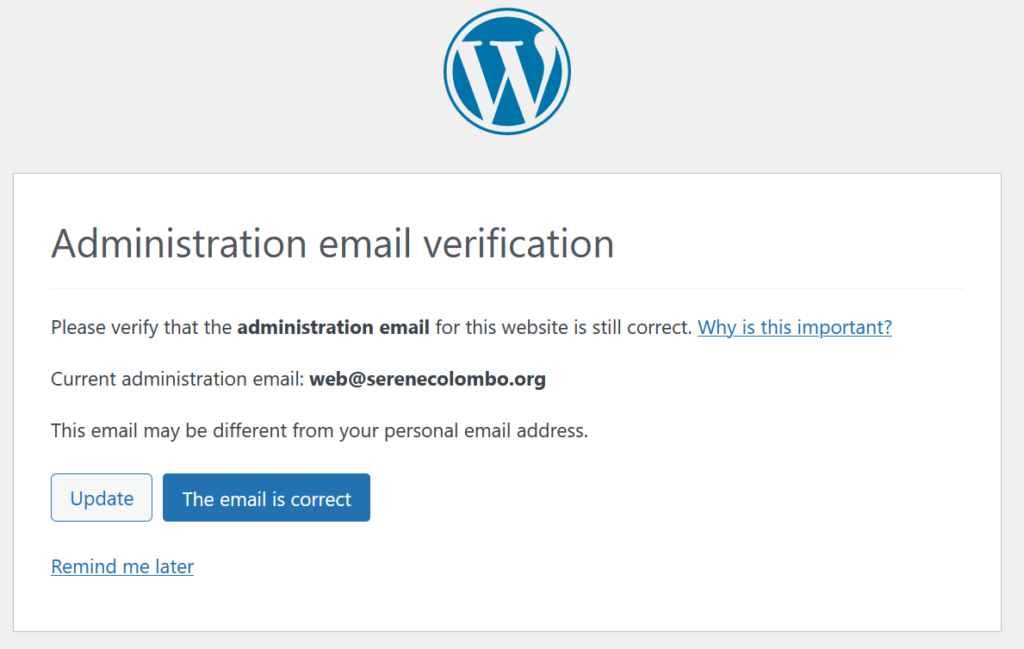
If you see the following message, click The email is correct.
If you get the following message, just go to the main admin page for the site at
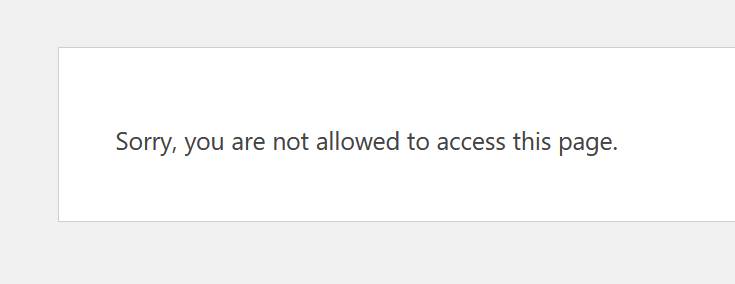
https://sandboxname.serenecolombo.org/wp-admin and you should be able to get in fine. Make sure to replace sandboxname with the real name.
You may be redirected to some plugin welcome page. You can just ignore that.
E. Prepare the sandbox for use
The following steps are essential and must not be skipped.
The next few steps will ensure that our volunteers don’t confuse the sandbox with the real site.
E1. Double check the URL to make sure you are doing these changes on the sandbox site not the real site.
E2. Change favicon/site icon by clicking on Appearance > Customize > Site identity > Site Icon > Change image
Type in the name of the sandbox site and you should get an image to use for the site icon. Select that image. For example:
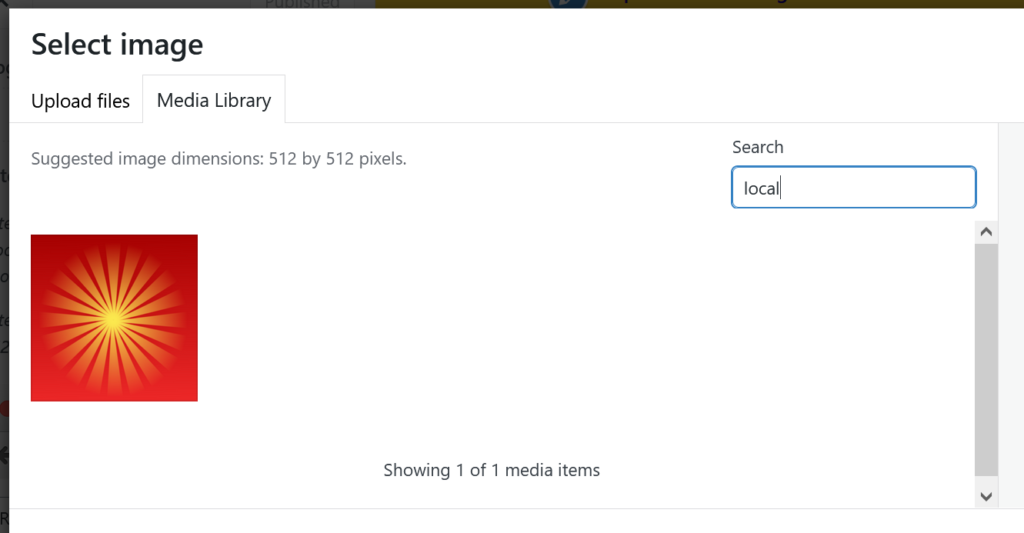
You should then see the new image appear:

E3. Now change the menu background colour by going to Appearance > Customize > Colors > Primary Navigation > Background
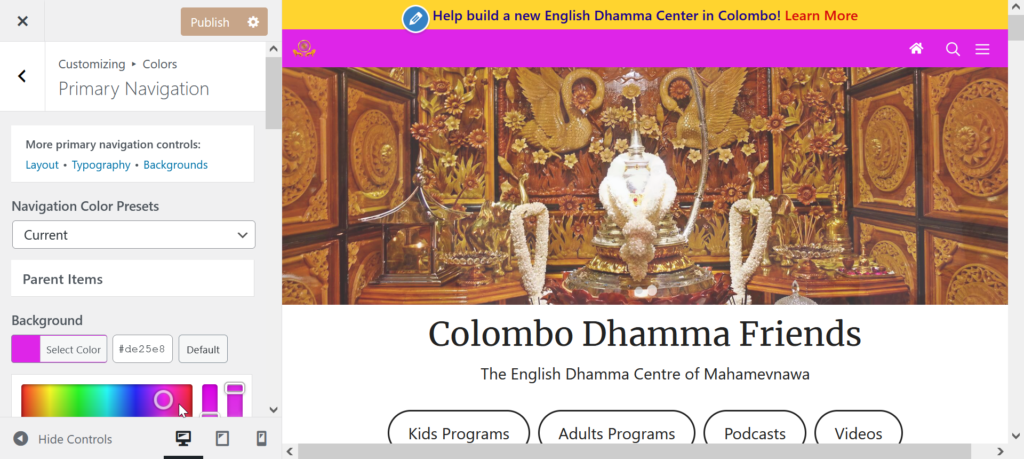
Click publish

E4. Change your back end colour scheme by going to Users > Profile > Admin Color Scheme and pick a different one from what you normally use.

E5. Stop google search by going to Settings > Reading > Search engine visibility and clicking the check box so it looks like this:

If you don’ do this, then our sandbox site will start appearing in Google searches.
E6. Trash Google Analytics Tracking Code by going to Appearance > Elements. Then search for google and trash the element titled Google Analytics Tracking Code. Then trash that element.

If you don’t do that, google will start collecting usage stats for the sandbox site.
E7. Remove some plugins by going to Plugins > Installed Plugins and deactivate and delete the following:
- Simple History
- UpdraftPlus