What do you need to know?
Uploading TIFF & PSD files to Media Archive
Basic process
- Download the files to your local drive
- Make sure files have quality names
- Keep original file name and add words to end to make it more meaningful
- Remove spaces
- Remove non-English letters
- If the image has a transparent background (i.e. cutout) then add -TRANSPARENT to the file name
- Generate thumbnails (tiff can be completely batch processed)
- 500px wide or high (whatever is shortest)
- Save as jpg, 60% compression or more
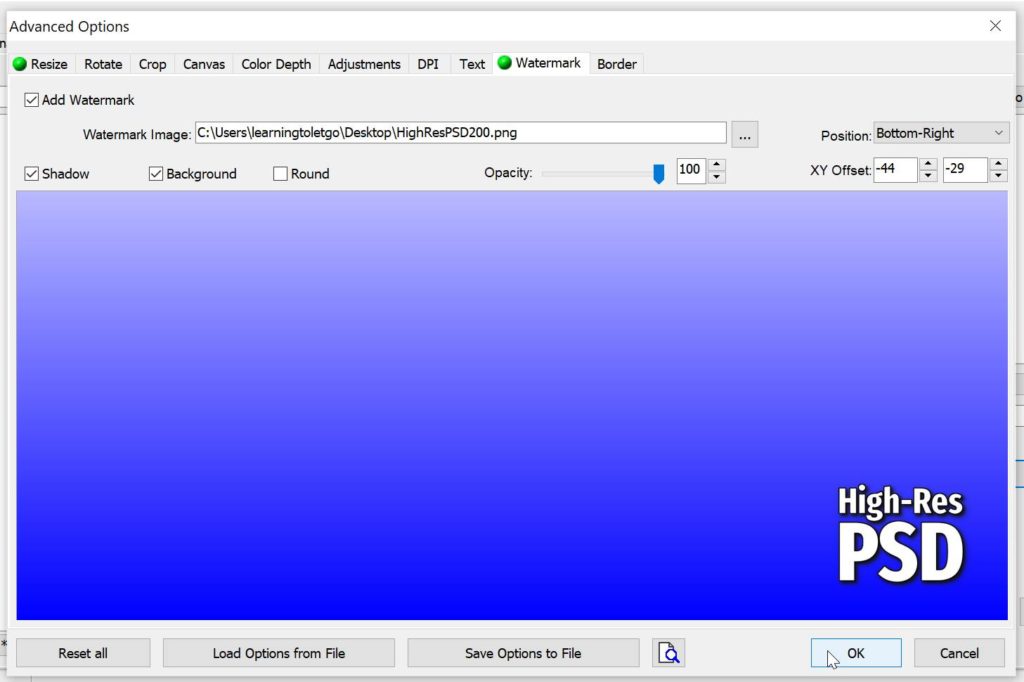
- Watermark with file type
- Compress original file
- 7z highest compression (or rar if that is significantly higher)
- Upload compressed file to media archive to proper folder
- Update Representative picture (aka thumbnail)
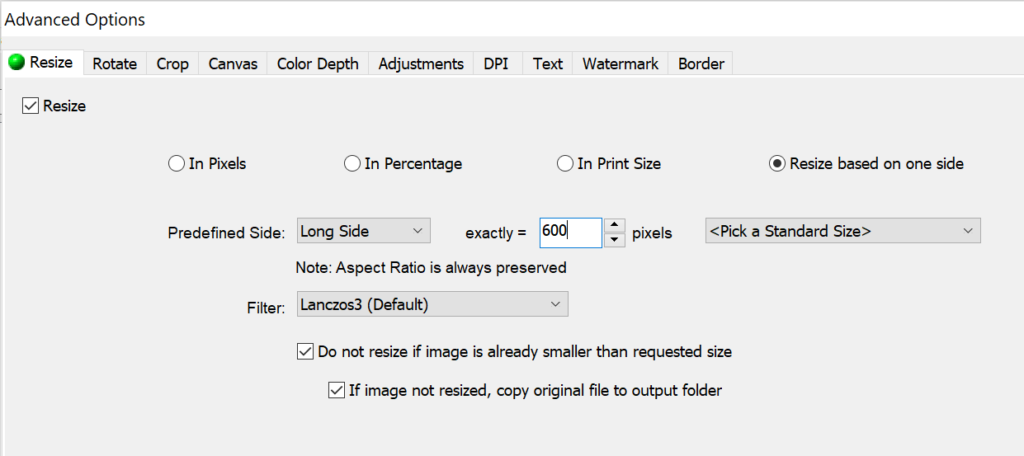
Resizing to longest side
When resizing, you can indicate that the longest side should be 600px
Watermarking
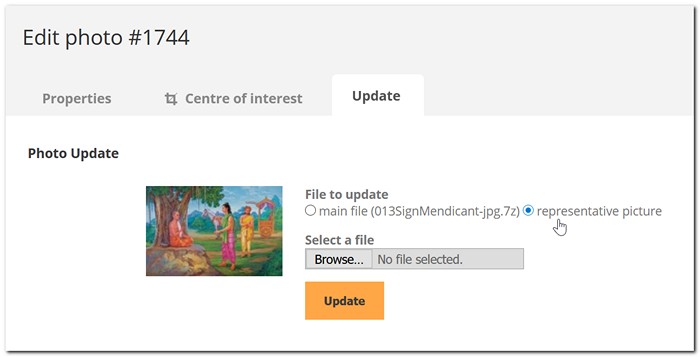
Update Representative picture
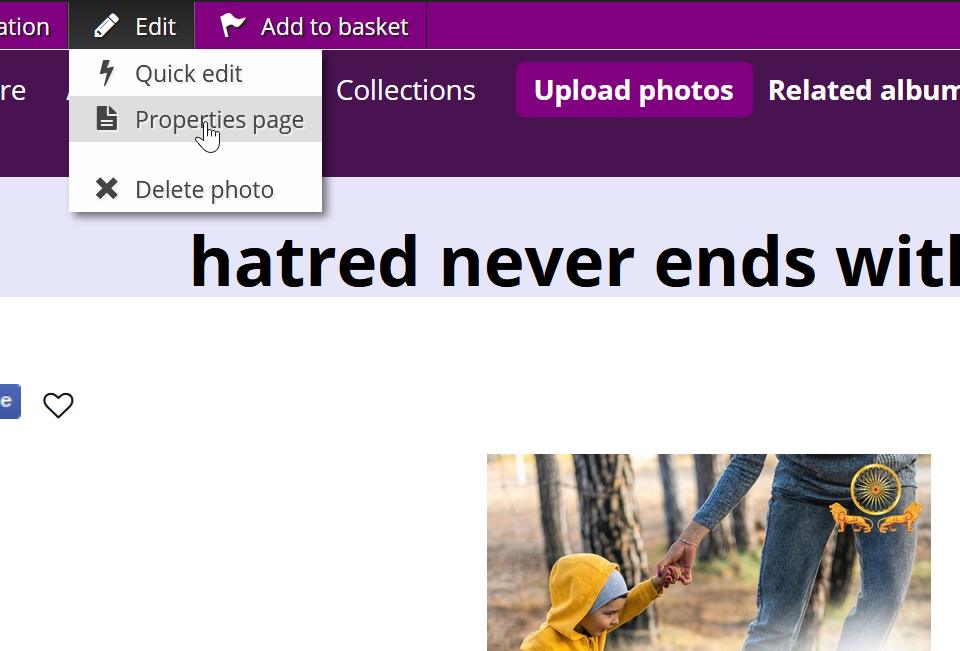
When viewing the image click Edit>Properties page
When there, go to Update>Representative picture.